Now that we had the basis for our conference, we could start the build out of the team.
The conference team was the focal point of the conference. Our thinking was once we can get people into this team, they shouldn’t need to look anywhere else for anything. Everything they need to access content, sessions and other activities could be found easily in the team.
Channels & Naming Conventions
Using Channels in Microsoft Teams allowed us to logically separate different types of content depending on the content type. We decided that we would have 4 main types of content, each with sub topics.
- Conference related information types
- Session related
- Sponsor / Exhibitor related information types
- Forum information types
- Social information types
Naming Convention
Naming convention for Channels was important because Teams displays channels in Alphabetical order. In order to ensure that the most important channels appeared at the top of the list, each type would need to be prefixed with a suitable letter or word in order of precedence in the Alphabet.
To decide on this, we ordered the types of information in each channel into the priority we thought Attendees would want. The following prefixes where added to each Channel that fell into the types of information we needed.
| Channel Type | Prefix |
| Conference | All |
| Session | Auditorium |
| Sponsor | Booth |
| Forum | Forum |
| Social | Social |
If we didn’t prefix then the Channels will be all over the place and the team really hard to navigate.
Conference Information Channels
Everyone needed to know what was going on and when in order to navigate the conference. We created the following Channels
- All – Ask the Organisers – Channel for anyone to ask us anything about how to find or do something.
- All – Conference Announcements – Channel for us as Organisers to make important announcements about the conference in-flight e.g. session changes or other ad-hoc guidances / news
- All – Conference Information – mainly used as a repository of information to access the conference including the agenda
- All – Feedback – used for posting reminders about leaving feedback for sessions
- All – Presentations – used by Speakers to upload their session presentations and for attendees to download
Session Channels
At the time we had the conference agenda on our website, but we knew that people would want and need a quicker way to join each one. We thought about adding the agenda web page as a tab in a channel. However, we thought that was too click heavy.
So we created a channel for each conference track and called them
- Auditorium – Administration
- Auditorium – Adoption
- Auditorium – Collaboration
- Auditorium – Voice
The idea of these channels where to automatically post join links for each session as they are about to start. Here is an example of what was posted in each of these channels.
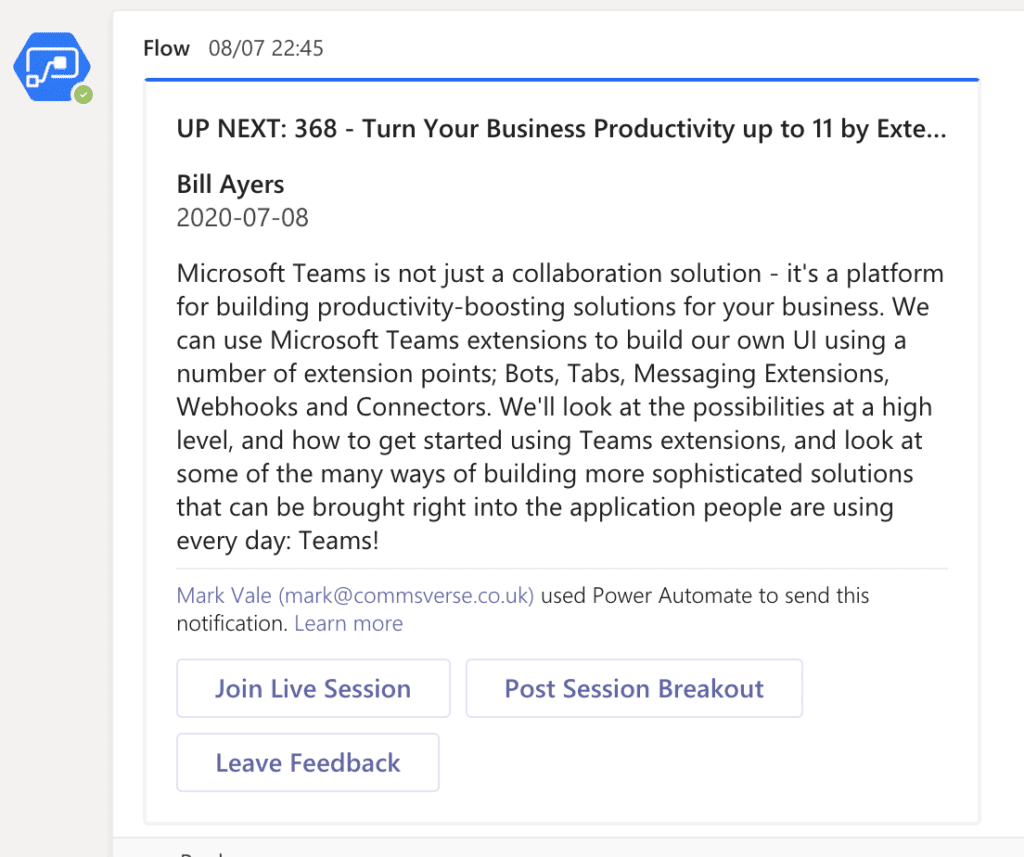

By doing this, attendees could simply watch a session track and on click join between events. You can see from the adaptive card we included the session title, speaker name, abstract and all the buttons they needed to join the event including the post session breakout meeting and feedback URL. More on how we did that later.
As a fallback, because we can’t always rely 100% on technology we had an Excel based agenda which could be viewed / downloaded which contained the same information in a table format.
Exhibitor Channels
We wanted to give every Exhibitor a dedicated space for them to engage with attendees. A dedicated channel we thought was needed to avoid clutter and their messages being lost in a sea of threads. It also gives the attendee a focal point for each exhibitor.
Inside this channel each exhibitor was a fully licensed member of Teams so could configure tabs, upload their own resource material, create channel meetings, Microsoft Forms, Polls etc.
The idea was that Attendees would come and browse these channels and perhaps ask questions about the Exhibitor’s products and services. Exhibitors in turn have active ‘booth members’ on hand to answer those public approaches and have the opportunity to nurture the conversation into a more private space, i.e. a Teams meeting, bookable using Microsoft Bookings.
In addition, by giving each exhibitor a licensed account and the privileges to create meetings, we hoped that this would generate additional content and engagement opportunities beyond the official agenda for spin-offs, product demo’s, panels and anything else in the imagination of each Exhibitor.


We saw some Exhibitors really take this opportunity by the horns and hosted a variety of additional sessions inside their channel
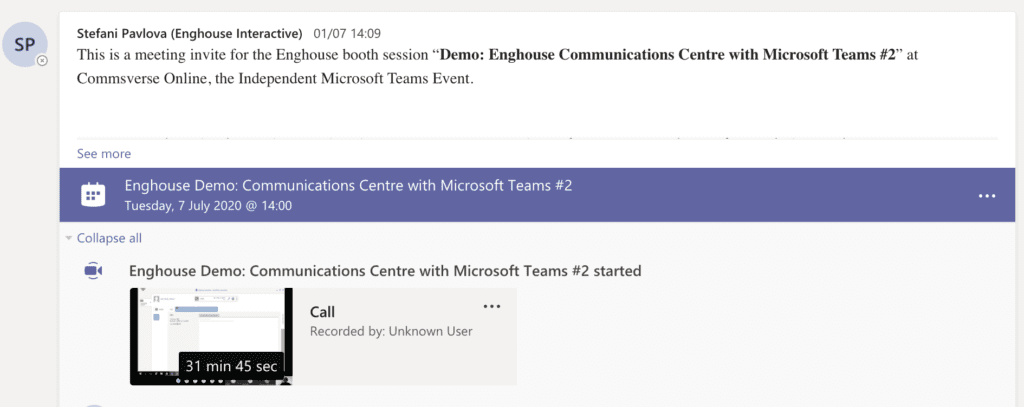

Exhibitor channels where called “Booth – Exhibitor name. It would have been nice for exhibitors who where classified as Headline, Platinum etc. to have been listed at the top, but unfortunately the alphabet doesn’t allow for that.
Instead a workaround was to use the Channel settings on the team to define the default display of channels to members. This can be found in ‘Manage team’, Channels
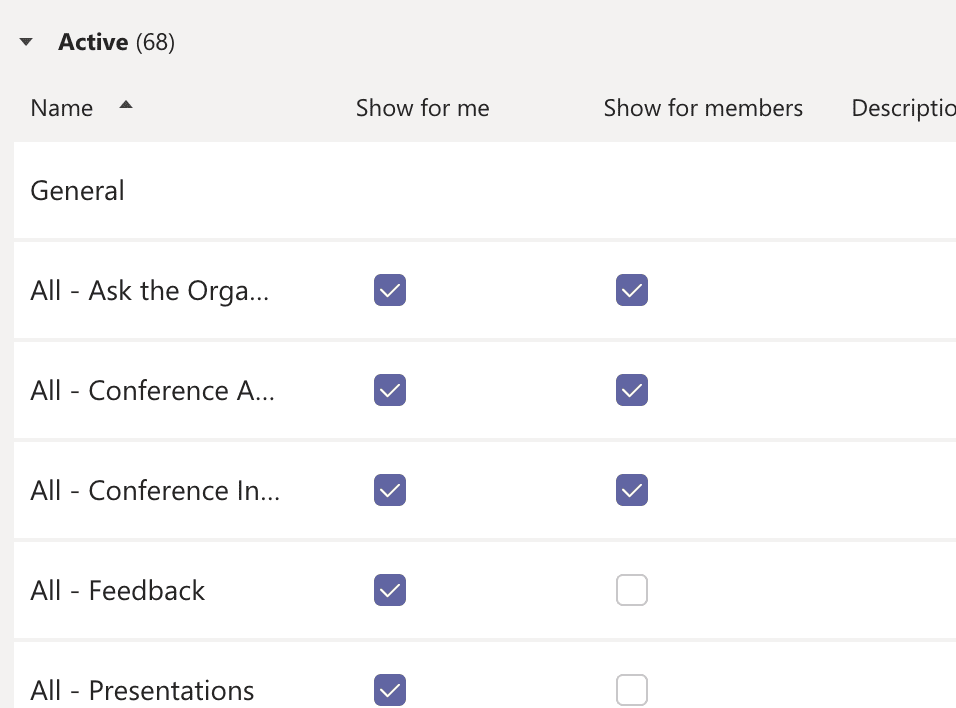

Note: This is limited to 10 channels so a balance between channel types needs to be thought of first.
Forum Channels
The forum channels where spaces where Attendees could come and ask generalised questions about their experience with Microsoft Teams. In a somewhat similar concept to the tech community on Microsoft.
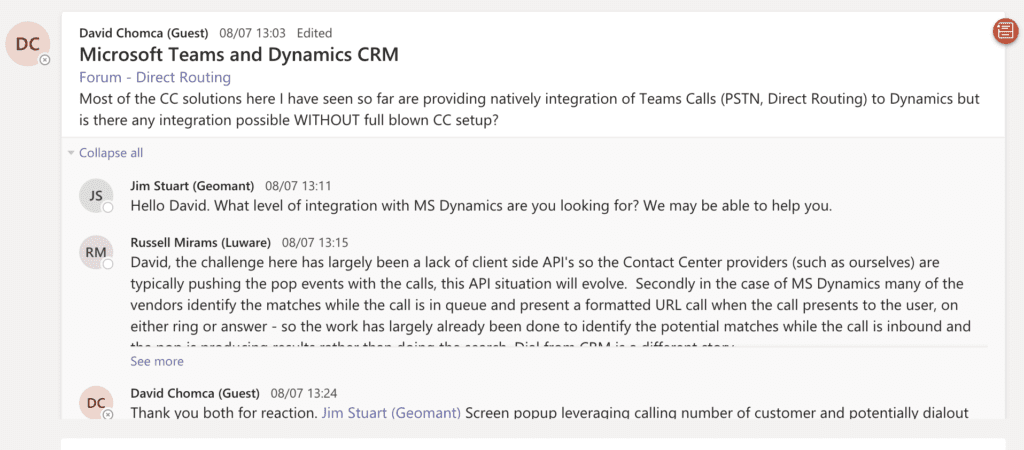

We had forum channels that matched our session tracks.
Social
We wanted to give everyone the ability to create their own social activities. With Guest users, the ability to schedule a meeting is not permitted because to do so requires an Exchange Calendar, which the Guest does not have.
If we could somehow provide that ability to everyone then this gave a wonderful opportunity for anyone to create their own networking opportunity and help make Commsverse that little bit more personal.
To make this happen we used Microsoft Forms with Power Automate to create a meeting space for the guest.
The process was as follows:
- Attendee would complete the form using their Auth account UPN e.g. [email protected]
- Power Automate would create a meeting using the Graph API using a licensed scheduling / service account for Teams / Exchange
- Power Automate would retrieve the web join link and then use the rebrandly API to shorten it
- Send a chat message back to the Attendee who submitted the form with the link to share and join the meeting
The Form
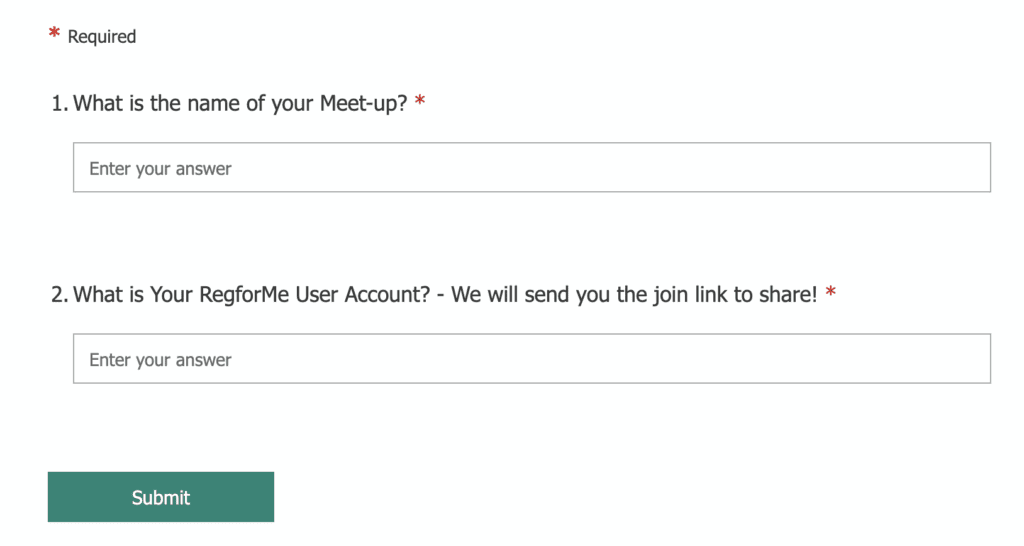

Just a simple two field form. 1 to give the meeting a title and some identification and the other the UPN of the Guest user requesting the meeting.
Power Automate
Next was creating a simple automation flow that would use this to create the meeting space.
For this flow we used the same AzureAD registered app for our registration flow and added the following API permission
- OnlineMeetings.ReadWrite.All
To begin our automated flow the trigger was “When a form is submitted” we then passed this to a HTTP action to send a POST request to the onlineMeetings endpoint in Microsoft Graph API.
The payload must contain
- The start date and time of the meeting
- The end date and time of the meeting
- The AzureAD objectID of the user the meeting is going to be created under
Optionally, a subject can be set. We did use this.
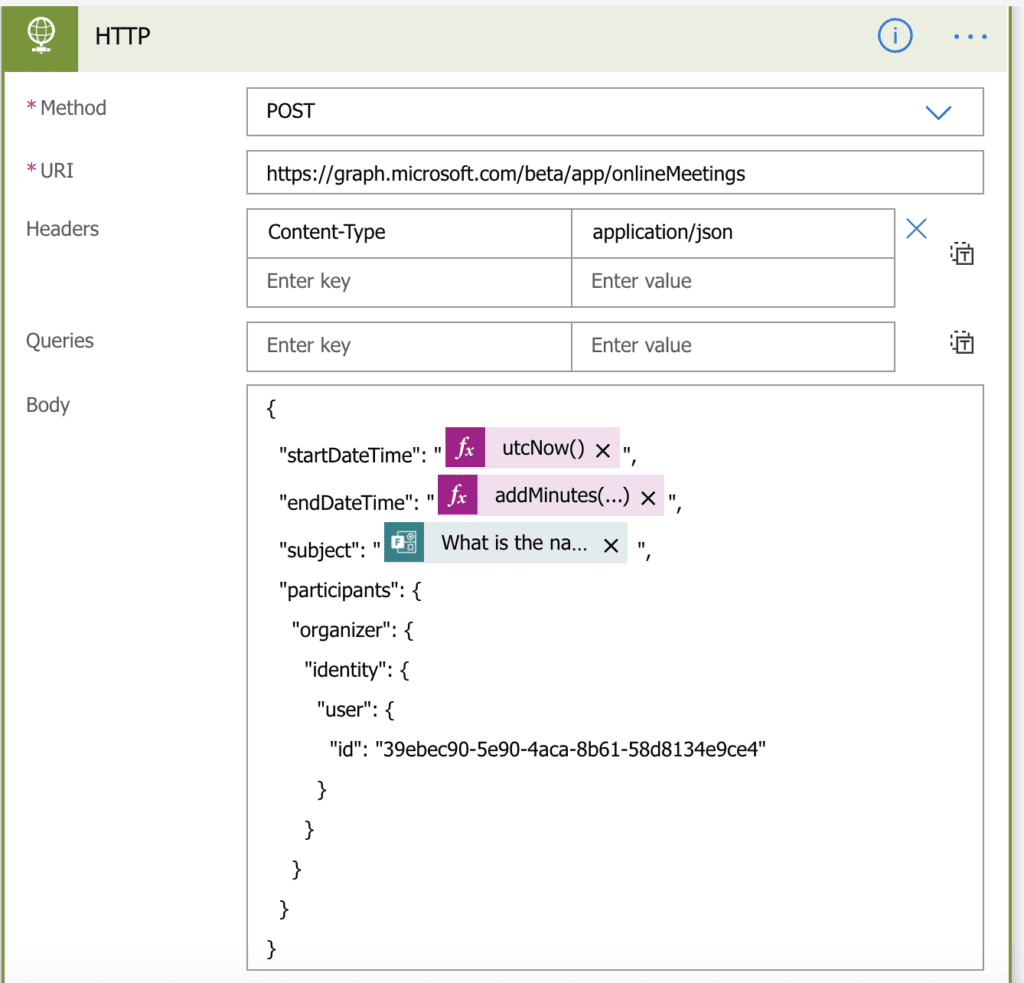

A couple of things we noticed with this method of creating a meeting:
- The start and end date time on the response was never set, it always returned 1 Jan 1970. However, this didn’t matter to us because we are not using calendaring for this meeting
- The meeting never showed up in the account we used to create this meeting under (by design of the API method)
Next was to parse the returned JSON payload to extract the meeting url for the Teams meeting created.
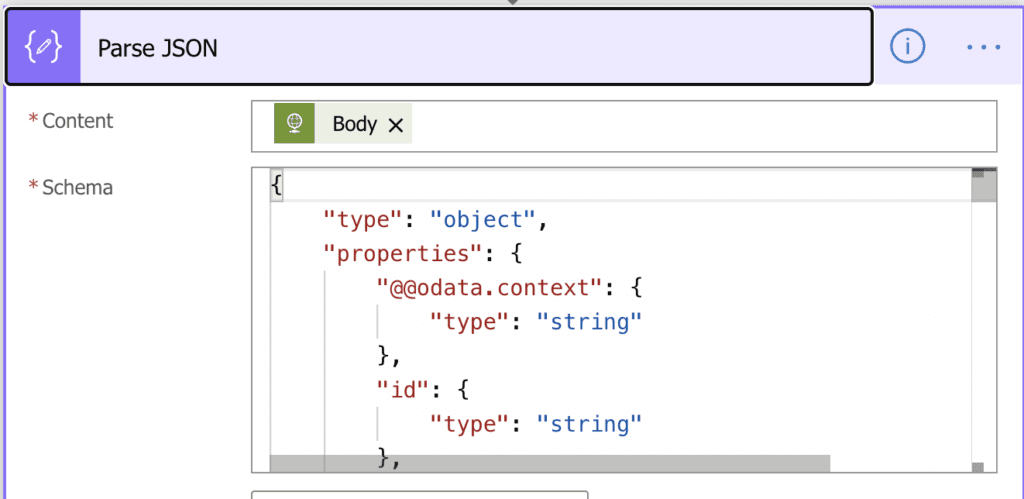

download the response schema if needed.
Now that we had the meeting join url we wanted to pass this back to the Attendee in a format that was easily copied. Simply serving them a 1,000 character meeting URL we thought would just be overwhelming and ugly.
To do this we used rebrandly API to shorten the meeting url for them. This also gave us additional visibility to how many of these meetings where created and roughly how many people joined them. So a win for both attendee and conference.
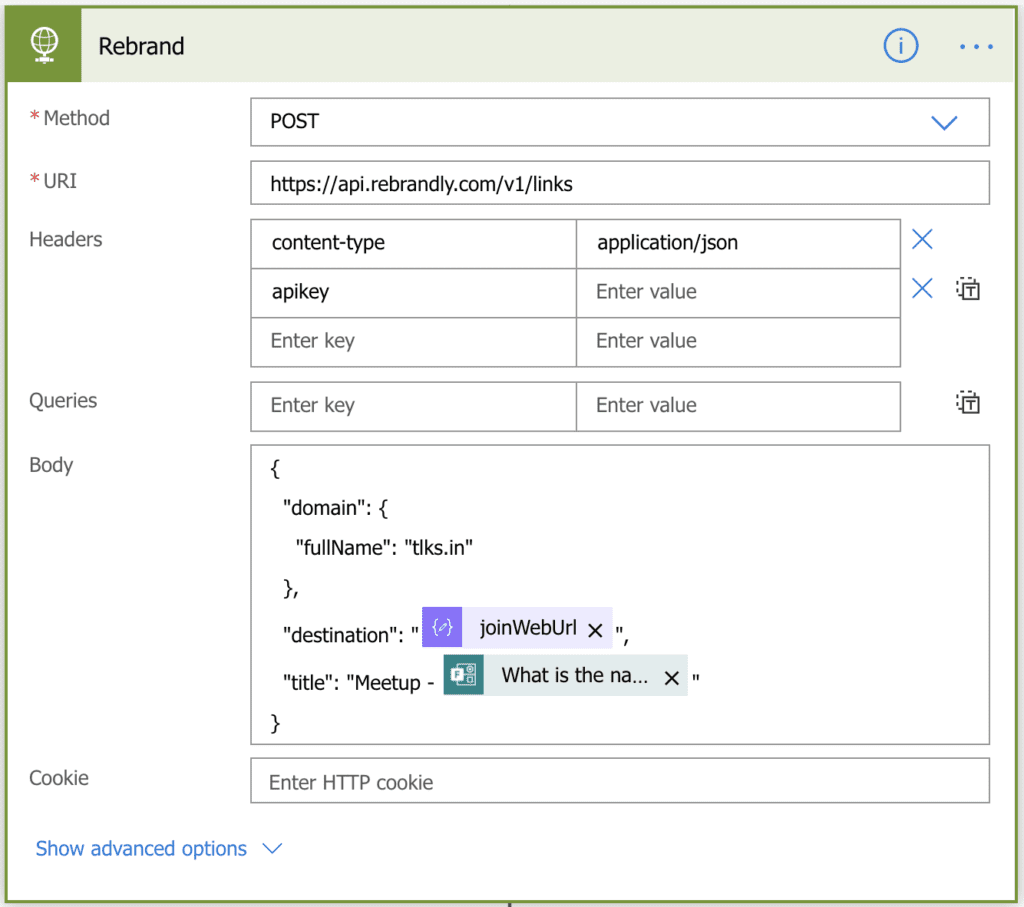

Here we passed the meeting url and gave the link the name of the meeting subject for visibility. Again we needed to parse the JSON response from rebrandly so that we could collect the short URL and use that in our message to the Attendee.
Posting a message to a user is built in Power Automate as an action. However, posting a chat message didn’t look entirely good, so we used our own adaptive card. You can create your own Adaptive Card using the Adaptive Card designer from Microsoft.
Once we were happy with the layout we copied the card design as JSON and pasted it into the Post Your Own Adaptive Card to a User Teams action.
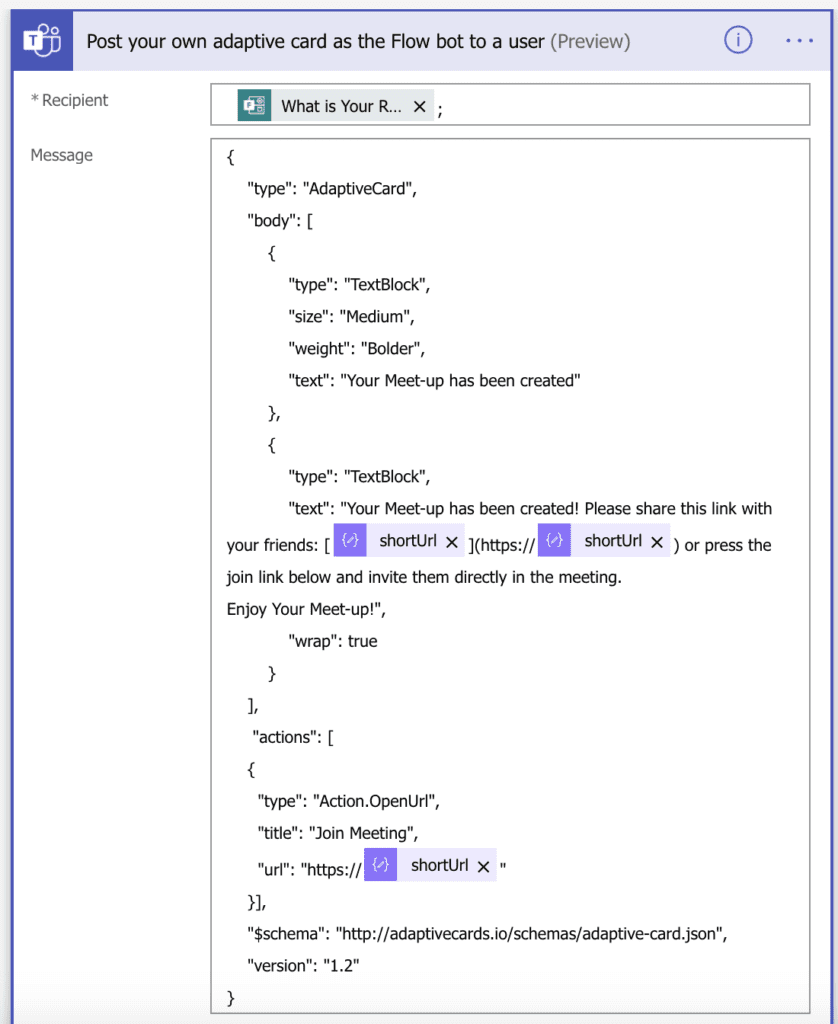

You can see here where we placed the dynamic data to personalise the card with the meeting information.
When the flow ran, the attendee would receive the following as a direct chat
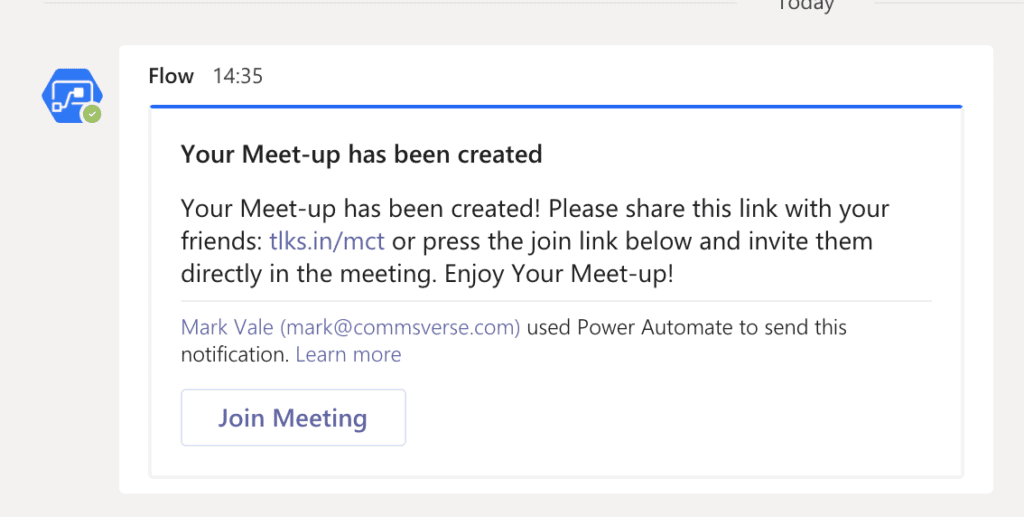

Now all the Attendee had to do was share the tlks.in URL in whatever social channel they wanted and when ready, click the Join Meeting button.
In Part 6 we discuss the agenda and session format in detail
